Manage images
When it comes to managing images in Umbraco, there are a few important points to note:
Image format:
For best results, the JPEG format is recommended for web, both on the web page and in automatically generated PDF documents. For high-resolution images that are reduced in resolution, the JPEG format can be used.
Image size:
It is important to adjust the image size before uploading an image. You should adjust the size in programs like Photoshop or similar to get a nice presentation. Avoid uploading images with too high a resolution. Reduce images using image reduction tools like Photoshop or freeware like TinyPNG before uploading.
Insert images into the report
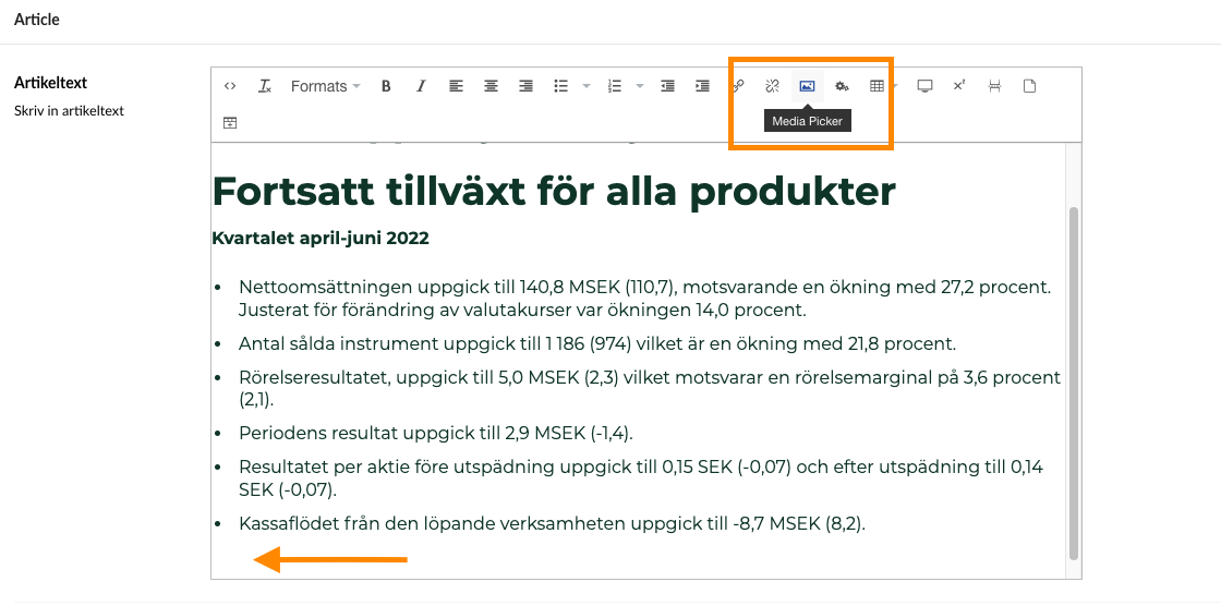
You can insert images directly into the text field in Umbraco. Before adding an image, make sure it is already uploaded to the media library (see the "Media library" section).
- Go to "Content" and navigate to the section where you want to insert an image.
- Place the cursor where you want the image.
- Click on the "Media Picker" icon.
- Select the correct folder in the media library and click the upload button. Then select the image in the media library to insert it into the text.
-
The box that appears shows the media library where you have already uploaded the image.
Select the correct folder in the media library and click the upload button. Then select in the image in the media library to insert it into the text.
- Click "Save and replace" to save the changes. The image will appear in the PDF document exactly as it is embedded in the text.
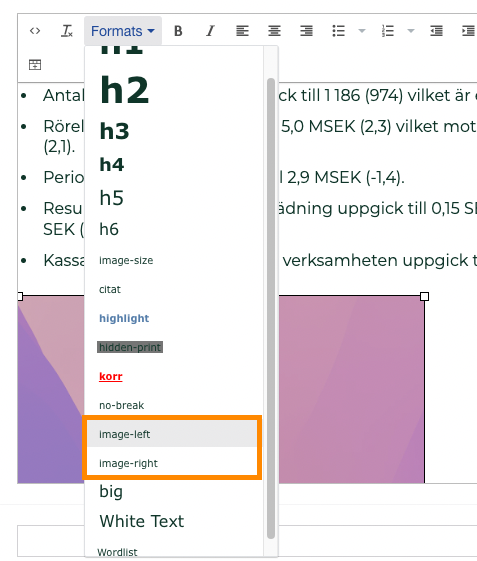
Image in right column
If you want to adjust the image to the right or left, select the image in content and select the appropriate format as "Image right" or "Image left". This can be used, for example, for CEO images.
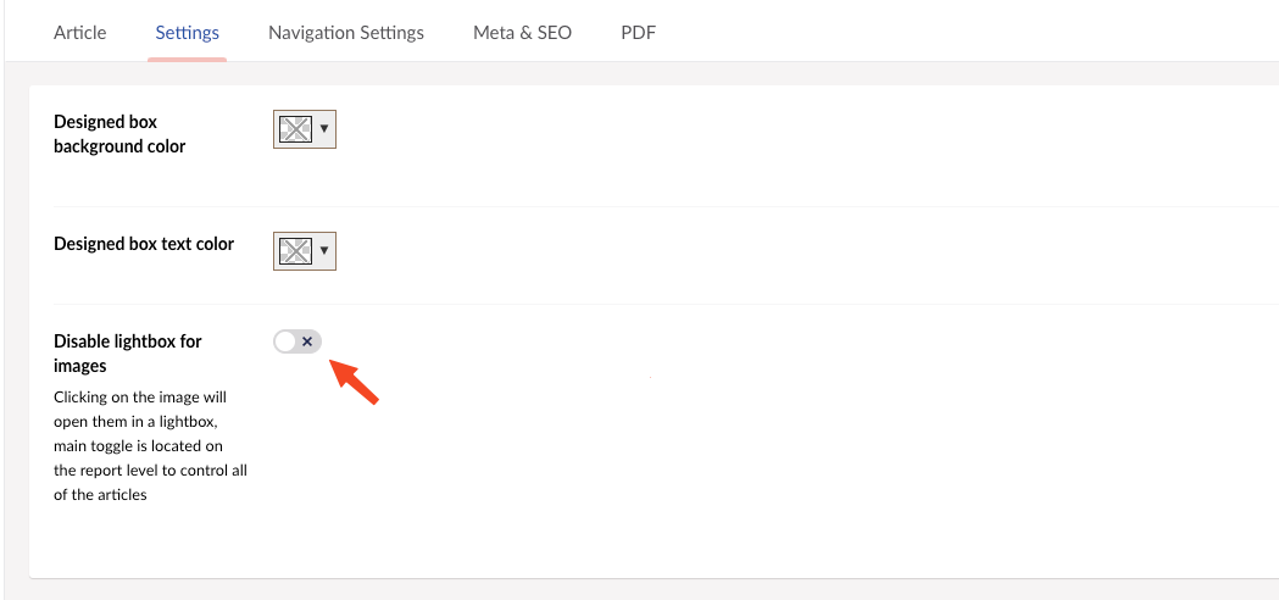
Use l in ghtbox
The lightbox feature allows you to click on the image to display it in a larger version on the screen. (You can test by clicking on the image below to see how it works).
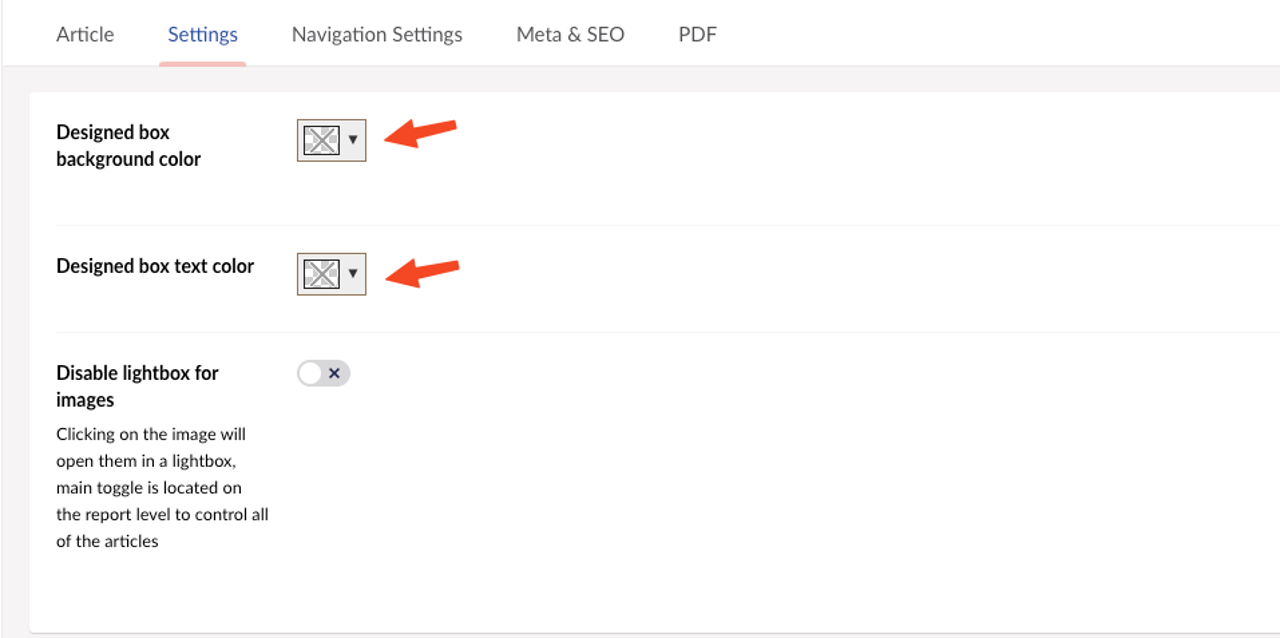
By default the Lightbox feature is enabled, but you can turn it off by clicking "disable Lightbox for images".
Use designed box
To use the designed box feature, click the icon on the far right.
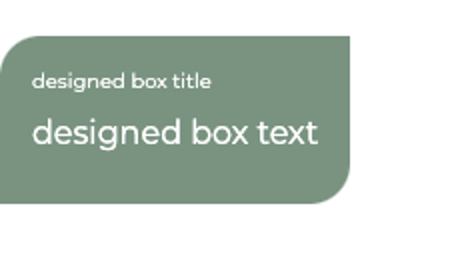

To change the color of the background or text in the box:
- Go to settings which you will find at the top.
-
Here you can choose the color for both text and background for the box.
3. Select the desired color for either the background or the text by clicking on the color palette or by entering a color code.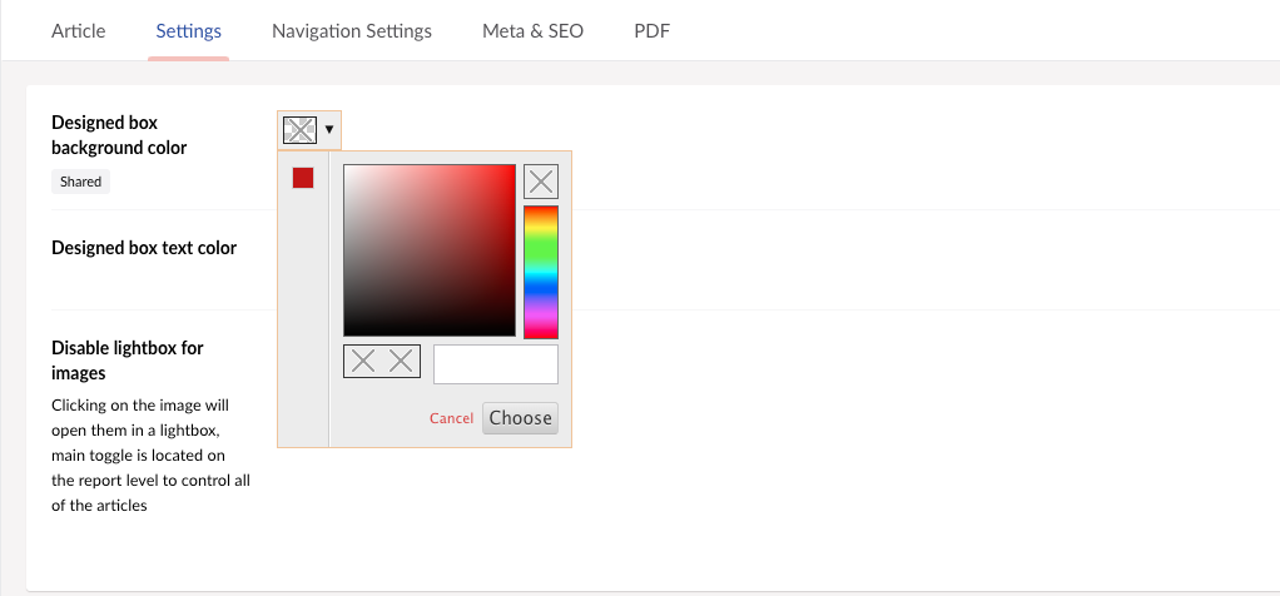
4. Once you have selected the desired color, save the settings. Now the background or text in the box will change according to your choice.